Growing Flowers and Meeting Their Pollinators

My attitude about growing flowers changed the day I visited my friend Renee at her cabin in the Santa Cruz mountains, California. At the time I was a twenty-three-year-old horticulture student. I sat at her kitchen table, eyeing the room, when I noticed a bouquet on the kitchen table.

It was an arrangement of fragrant flowers with lavender, roses, delphinium, and baby’s breath. My internal dialog commented, “Oh those are probably from the UC Santa Cruz Farm and Garden.” It was a dismissive thought. You can’t eat them, what’s the point.

Then it dawned on me—I had picked those flowers and arranged this very bouquet, just two weeks before. My sister was then apprenticing at UCSC Farm and had invited me to gather a bouquet for Renee, a new mother. Stunned, I saw my bias. Flowers seemed frivolous, when I was on the revolutionary-edge of organic food growing in 1980.

That was the incident that changed my life, it was okay to love flowers as I always had. After getting my Horticulture degree, I apprenticed at Camp Joy in Boulder Creek, CA. I learned to sow seeds in wood flats;  tend young seedlings in the greenhouse; and plant them in double-dug raised beds.

Twice a week, before the sun rose over the mountain ridge, we harvested flowers and placed them in large tin cans in the shade of the gazebo. I was taught that the key to selecting young flowers was in the reproductive parts. I became skilled at noting if a flower’s stamens were moist with fresh pollen or not. Daisy-like flowers, with their disk and ray flowers were easy, once the secret was revealed. Bending down to look closely at the yellow center one could see if the rings of tiny flower parts were all open, if so then the flower was old. But if just a couple of outer rings of disk flowers were open, it was prime for harvesting.
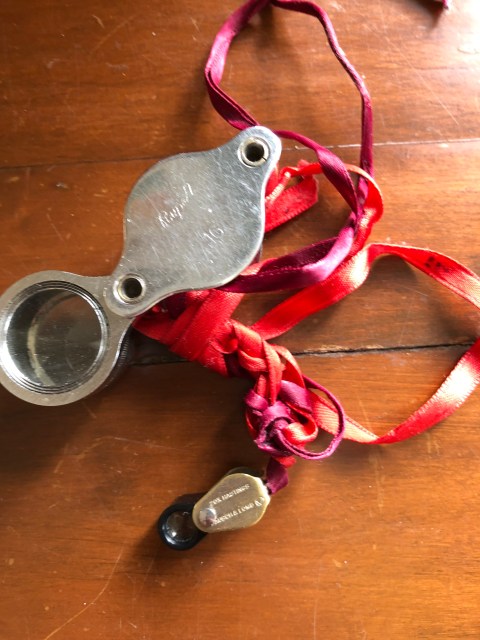
The day I purchased my 20-magnification hand lens, the world of insects opened up. Looking through this loupe was like landing on a planet. By placing the lens close to my face, my hand on my cheek bone to steady the lens, I moved in close,  a spaceship landing on a  miniature  floral world. The intricate textures of leaves, flowers and seeds were mesmerizing. I peered deeply into a flower chamber,  translucent in color, while male and female flower parts became giant. I imagined myself a tiny creature crawling over these exquisite sculptures.
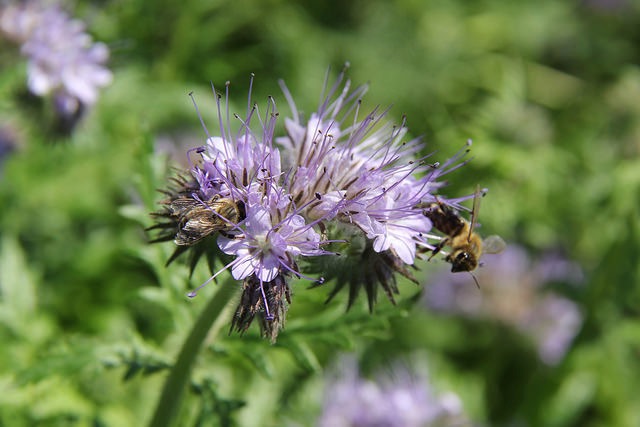
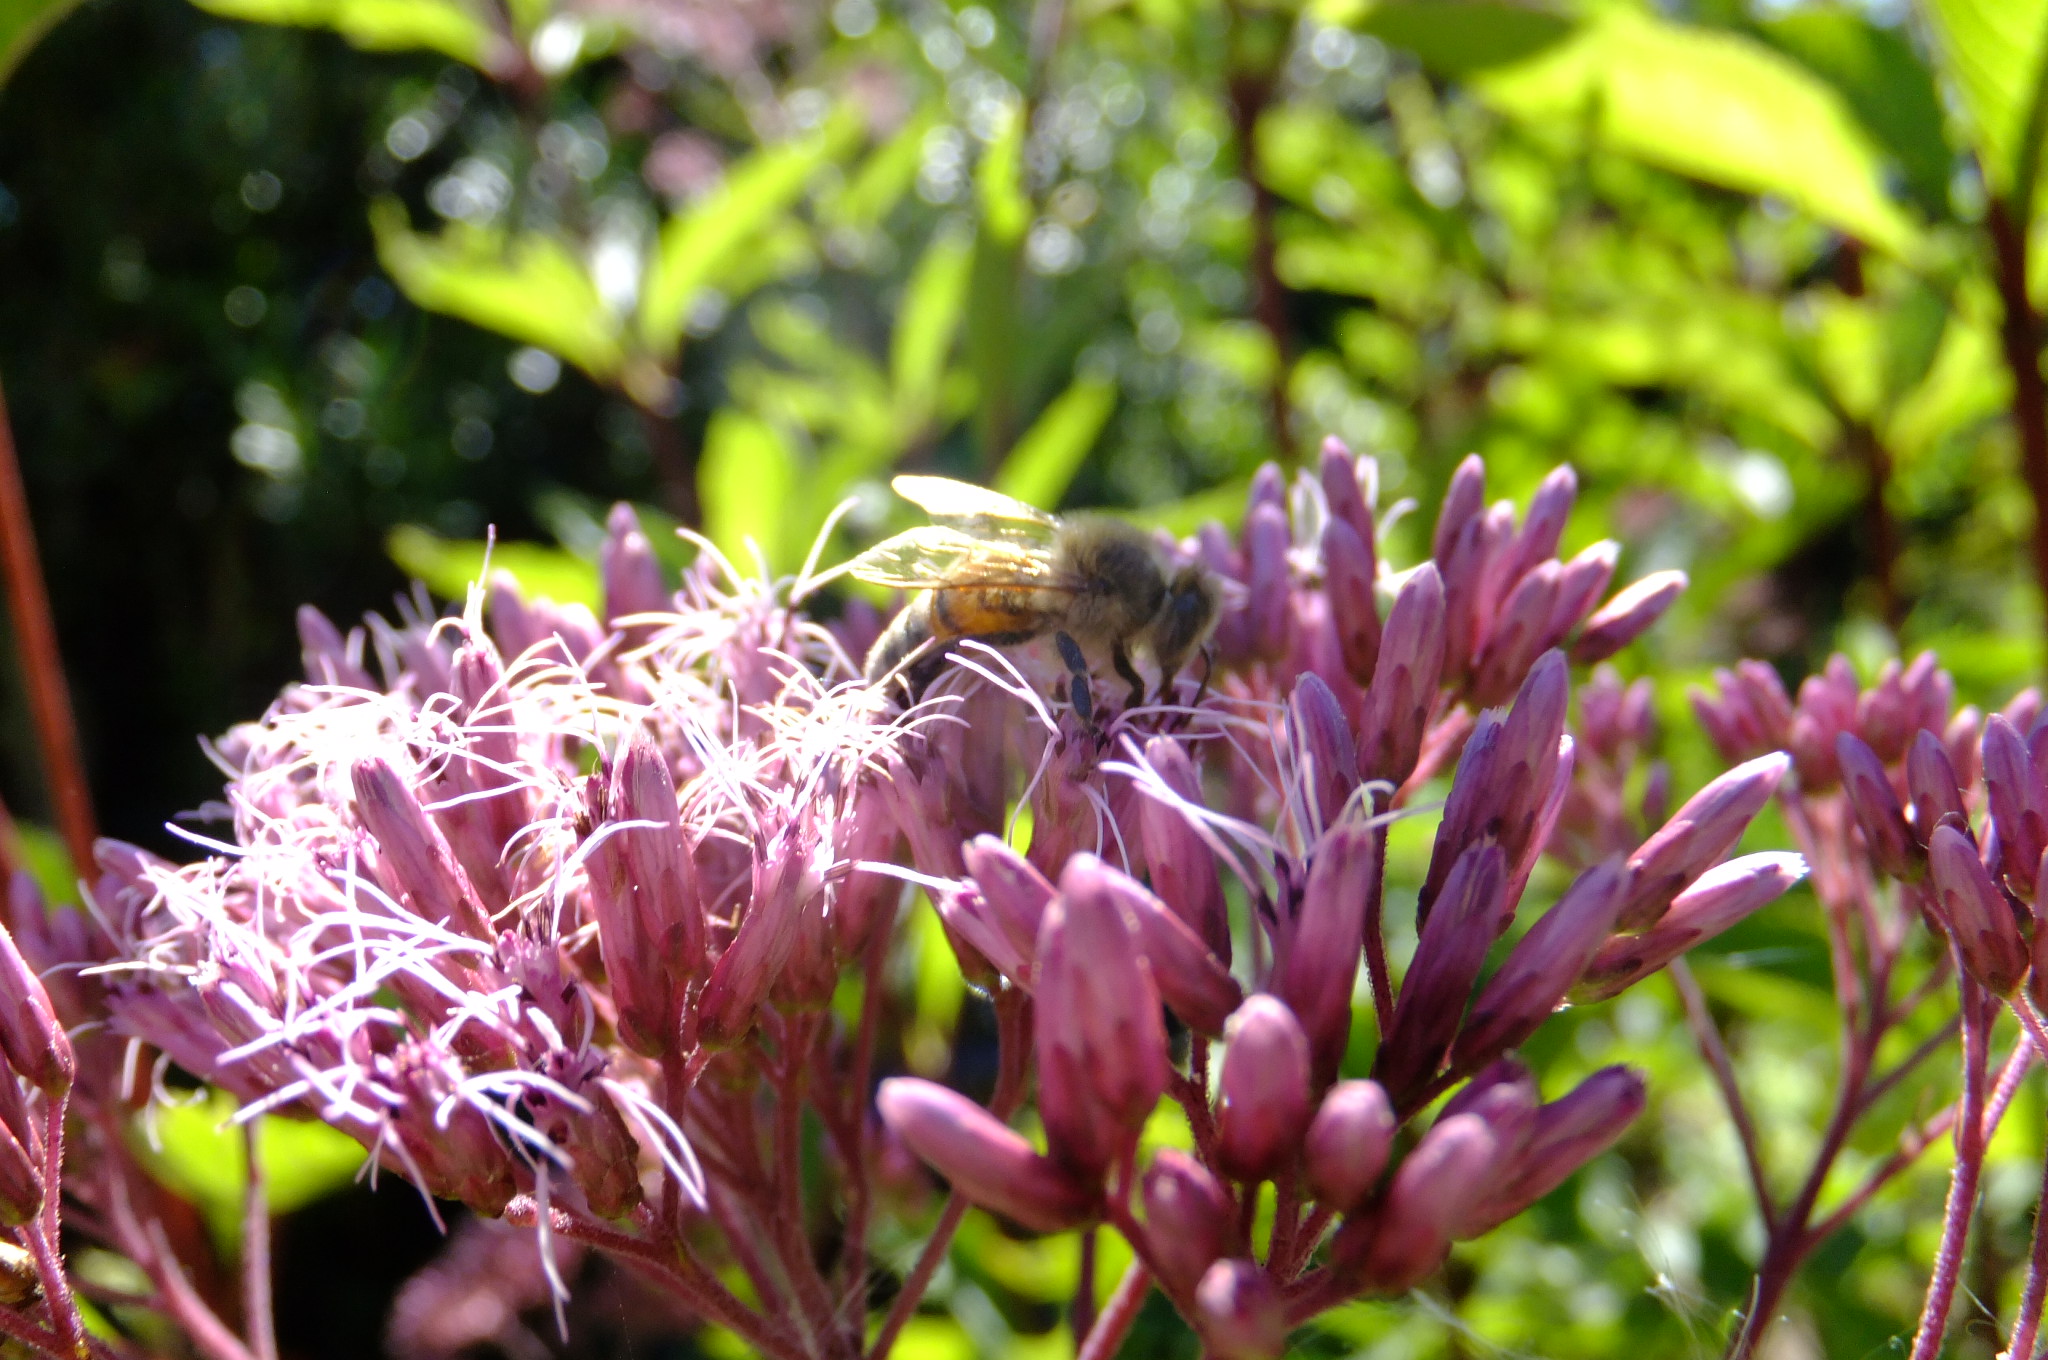
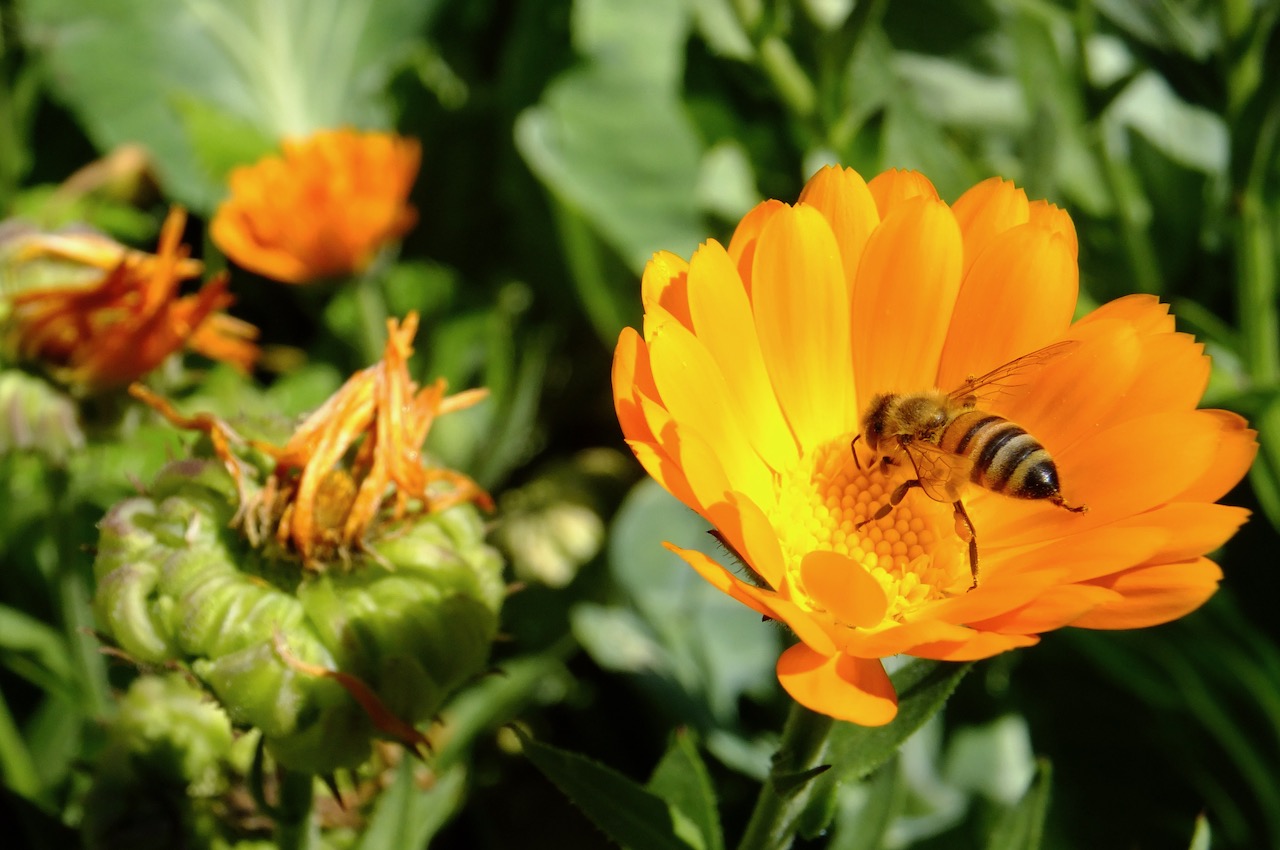
Honey bees on Phacelia

I had to study insects in the horticulture program, after all the little buggers ate our crops. But we also learned of beneficial insects–predators and pollinators. There was  humor in considering the caterpillar as a juvenile delinquent chomping on the parsley leaves, but then when the caterpillar metamorphosed into the Swallow-tail Butterfly, it pollinated flowers like a mature, contributing citizen.

Getting to know insects became part of understanding the garden ecosystem. Like a bird-enthusiast with binoculars, I sought insects with my lens. This requires patience! At first recognizing the different creatures based on their anatomy—wings and mouth parts being essential clues, eventually I moved on to noting their behavior.

Over the years I have watched green lacewings laying eggs; each on a solitary stalk. These predators are so voracious, the emerging young would eat the surrounding eggs if they were not out of the way. Also, I have seen lady bug larvae that look like giant Gila monsters gobbling up aphids. And no lie, I have watched aphids pop out live babies.

Lady bug larvae

Learning about pollinators in my backyard offered me the chance to slow down, and become curious. Did you know that a butterfly can taste with its feet? That when it lands on a petal that has nectar-bearing flowers that its siphon-like tongue unfurls? I have seen this. It takes patience, but watching insects is a form of miniature wildlife viewing.

Bees can see colors invisible to the human eye. Foxglove flowers have ultraviolet circles around maroon spots, marking a trail to lure pollinators deep into the trumpet bloom where a reward of pollen and nectar await.

The honey bee is but one of many kinds of bee. Native to the Mediterranean, and introduced around the world, it is a generalist, pollinating many flowers. And yet, it shares a characteristic with all bees that make them the premiere partner for flower pollination—floral fidelity. This means on any given foraging trip they only gather pollen from one species. Efficient for the insect and fundamental for the plant to produce seed, bees are the most important group of insects.

Scientists now know that bees are a keystone species–creatures necessary for the survival of other organisms in an ecosystem. Keystone species are referred to as the glue that holds a system together–without them an ecosystem may not be resilient enough to adapt to climate change. There are native flowers that depend on one or two types of bee to pollinate them.

Also, bees and other pollinators are responsible for food crop pollination. According to the USDA, bees, both honey and native are responsible for the pollination of 75 percent of fruits, vegetables, and nuts in this country. Another way to look at it is one out of every four bites of food can be traced back to pollinator services.

Jim Nelson at Camp Joy, a beekeeper, told me something I never forgot. “Imagine yourself tiny, the size a bee. As you approach a flat-topped white yarrow, a Sedum Autumn Joy, or a sunflower, you would see an  entire field of flowers.” A bee’s-eye view of the world makes me want to plant these flowers and patiently watch the insects that come foraging.
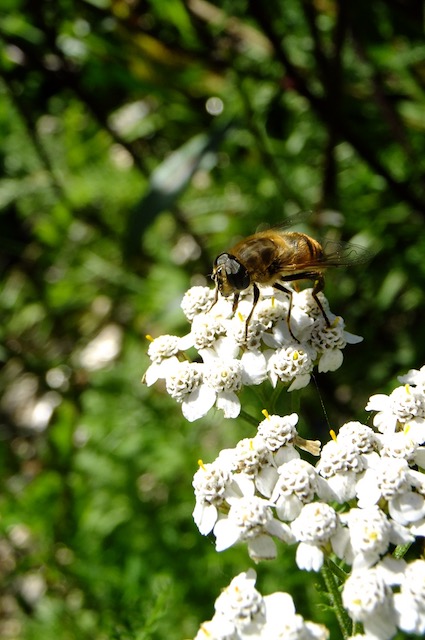
Asparagus

Asparagus shoots are emerging–here is a crop to test our commitment to delayed gratification!  Some clients have told me they tried growing asparagus but gave up. This perennial vegetable requires a dedicated bed and will produce for decades if well-tended. Growing asparagus well is time-consuming; let’s look at what it takes. One trick is to prepare the planting site well in advance.

 Preparing the bed: Diligently remove all perennial weeds and prevent them from getting established. Add lots of organic matter and water deeply until the plants are  established. If the soil is heavy clay,  prepare a raised bed. Wait a couple of years before harvesting to allow the plants to get established.

Harvesting: Begins for a couple of weeks in the third year. Snap or cut the shoots at the base. After about five years, harvest for almost 8 weeks or as long as the shoots are vigorous and finger-wide. Stop harvesting before emerging shoots are spindly. By allowing the fronds to grow and nourish the plant, we  prevent the plant from losing vigor.

The plants are either male or female. They are sold in nurseries as 1-year old crowns. All-male varieties have the advantage of bigger shoots. Growing them from seed means you will also have slender female plants that put more energy into producing red fruits and seed. Be sure to remove volunteer seedlings so they don’t crowd out the initial crowns. In the autumn after the plants turn yellow, cut them to the ground.

Staking: Do you lean more to the aesthetic or very efficient gardening mode? An asparagus crop is a prime candidate for edible landscaping with its ferny leaves. Stake individual plants or use a horizontal trellis (used for growing long-stemmed flowers) to allow the ferny fronds to sway a bit.

 If you have a no-nonsense, efficient approach to the garden then plant them in a row and place wood or metal posts at both ends. Once the plants are tall and start to bend, string a line from post to post and pin the plants in as the plants mature. A month later twine another string about a foot or two above the first to hold them in place. In any event, asparagus is a delicious addition to the garden.

April in the Garden 2024

Springtime can be overwhelming. Everywhere we look something is calling out in need of attention. One of my garden mentors, Beth Nelson from Camp Joy Gardens, always said, “The garden is forgiving. If we don’t get it right this year, we can try again next year. Be patient with yourself.” Enjoy the time in the garden. Here are suggestions for where to begin:

  • General garden maintenance
  • Liquid fertilizer like fish and seaweed solution benefits plants more quickly in cold soil than the dry fertilizer.
  • Control weeds before they flower.
  • In the edible garden
  • Time to pull back straw mulch to allow the soil to warm.
  • Plant bare-root strawberries and raspberries
  • Transplant vegetable starts
  • Cover pea bed with floating row covers
  • Direct sow root crops like radish, spinach, chard, lettuce, mustard greens
  • Top-dress beds of perennial crops and flowers with well-aged compost.
  • Landscape care
  • Read our post about pruning flowering shrubs
  • Replenish alder chips or arborist-chip mulch. Be careful with trunks of shrubs & trees—no mulch within six inches. (Mulch can keep the trunks moist and allow disease organisms to breed.)
  • Add lime to lawns.
  • Learn to appreciate the many benefits of weeds in the lawn—think polyculture!
  • Mow grass leaving it about 2 1/2 inches tall.
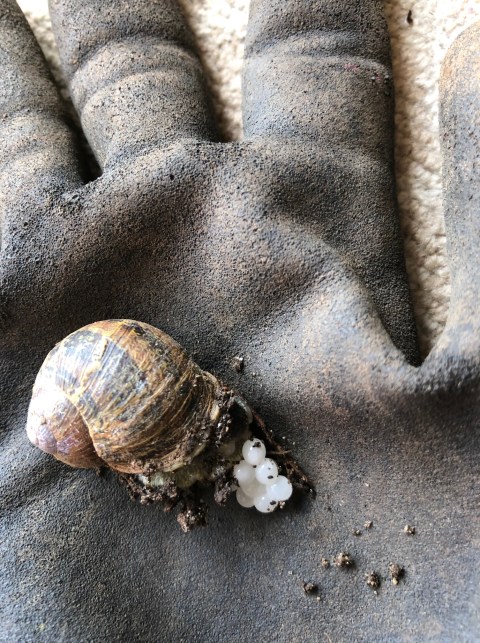
  • Hand pick & destroy slugs and snails. Learn to recognize snail eggs.
  • Sprinkle Sluggo or other nontoxic slug bait

Vegetable Starts

Start seeds indoors if you can grow healthy starts that are sturdy and dark green. Inadequate light causes the seedlings to grow spindly and fragile. Indoor lighting is dim compared with sunshine. Even a cloudy day offers more light than a typical florescent grow-light.

Once they have germinated, place the seedling trays outside on nice days. At first place them in a protected bright spot and then a day or two later, set them in full sunlight. And a light breeze will help then get sturdier. Also, by placing them outside, and bringing them in at night, the seedlings have begun the harden-off process. Otherwise, if they are greenhouse grown and then directly placed in the cold garden soil, the young plants can go into shock rather than grow.

The goal is to transplant them to the garden when they have two or three sets of true leaves. A grey, overcast day helps prevent transplant shock. If all this is too much effort, buy the vegetable starts. You can always sow your own seeds later in the season. We are so lucky here in Jefferson County to have excellent seedlings available from Midori Farm and Red Dog Farm. They are available now at the PT food Coop and Chimacum Corner Farmstand. They carry an array of vegetable varieties that thrive here.

Pruning

Shrubs that produce vigorous replacement shoots are good plants to learn pruning. These  flower on one-year old wood. If you only shear them, they never flower well. Also there will be a lot of thicker woody stems. Remove any crossing branches and weak or dead stems.

Proper pruning is a combination of thinning out—removing the branch all the way back to a larger branch, and heading back—what hedge shears are good for. Most novices just do heading back cuts. The problem is the plant grows into a dense hedge with just an inch or two of vegetation on the surface. A healthy pruning jobs increases the depth of foliage by allowing light and air in to the shrub.

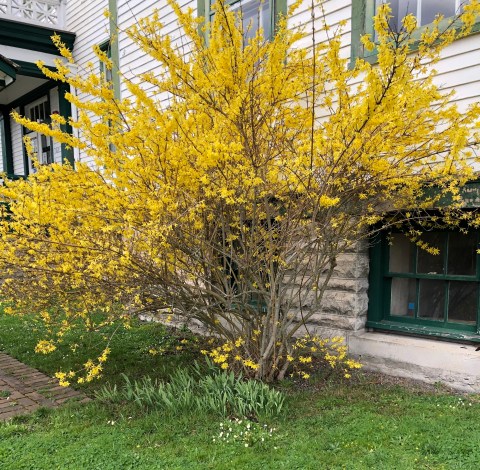
Examples are flowering currant, mock orange (or Philadelphus), forsythia, kerria and flowering quince. Wait until the flowers are faded before pruning.

Making Lists

Springtime can be overwhelming. Everywhere we look something is calling out in need of attention. One solution is making lists. Walk through the garden and write down anything that needs attention. Next set priorities. Sometimes fifteen minutes is enough time to tackle a crucial task. To borrow a term from construction industry, consider making a punch list. Keep a running list of projects that require additional help or some expertise. At the end of the day, it is satisfying to cross off items. Of course, sometimes I enjoy puttering in the garden, skipping around in a relaxed fashion. This can be a form of horticultural therapy where enjoying the clouds skittering across the sky, or watching insect behavior is just as satisfying as accomplishing something.

Permaculture Shrub Goumi


A friend of mine has moved to a beautiful old craftsman style-cottage in Port Townsend with a landscape full of edible plants. The other day a fragrant scent greeted me as I opened the gate. I turned down the side brick path before knocking on the door.

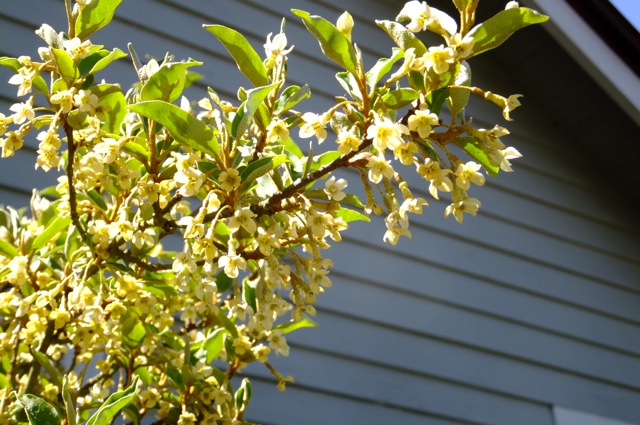
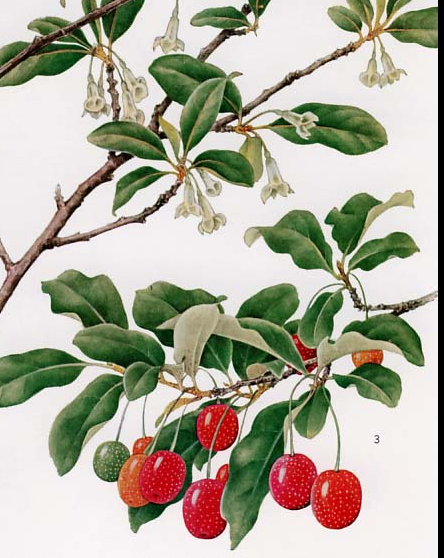
Was it coming from the flowering shrub with an abundance of pale-yellow tubular flowers? The shrub was humming with bees and other pollinators. What was it? The bronze colored scale on the tender stems made me think of Elaeagnus, the genus including Autumn Olive and Silverberry. But so many flowers! Compare the photo to the botanical illustration of the species below.

Late April 2014
Late April 2014

Elaeagnus multiflora

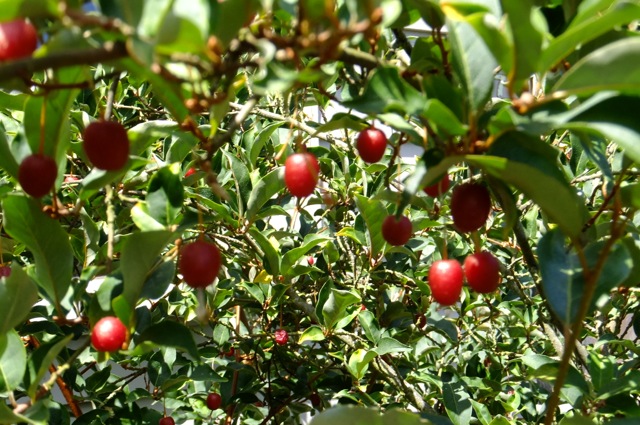
Knowing this was an edible landscape, my mind flashed to an unusual deciduous shrub I knew from a garden I once tended in the late 1990’s. What was the name-goji? No, but something like that. The scarlet berries dangled from stems tantalizing me. In late summer I popped them in my mouth to savor the astringent sweet-tart flavors. The longer they were left unpicked the sweeter they became, that is if the birds didn’t get them first.

But the shrub I remembered was never wreathed in blossoms. The flowers were sparse. The shrub was growing on the edge of the garden next to blueberries, rhubarb, and Abronia. The client had gotten the plants from One Green World Nursery. I remember reading their catalog that promoted Mountain Ash, Sea Buckhorn, and other ornamentals that plant breeders in Russia and and Ukraine had been selecting for larger, more delicious fruits. The Oregon nursery owners had gone on plant expeditions to bring back edible crops.

QUICK FACTS

  • Soil: flexible, variable pH
  • Water needs: drought tolerant once established
  • Pest: disease and pest resistant. Protect trunks from girdling by rodent
  • Height: 6 to 9 feet
  • Foliage: deciduous silvery green
  • USDA hardiness: Zones 5-9
  • Medicinal: Lycopenes help prevent heart disease.
  • Propagation: Species by seed from ripe seed. Varieties by softwood cuttings with a heel in July/ August or hardwood cuttings from current year’s growth or and layering.
  • Cultivars: Sweet Scarlet™, Ukranian variety self-fertile but best when cross-pollinated with Red Gem™. Note trademark means plants are patented and cannot be propagated for commercial production!

Elaeagnus multiflora, an Asian native has been cultivated in the US for many years. LH Bailey, one of my horticultural heroes discusses it in The Standard Cyclopedia of Horticulture in 1927. It is native to Japan where it is known as natsugumi. There it grows into a small tree. Other edible Japanese natives in the genus include Aki-gumi, E. umbellate, known here as Autumn Olive. The fruits of this shrub are high in lycopene, so goumi may be too. Unlike Autumn Olive goumi is not invasive.

Nawashiro-gumi, E. pungens.

But this shrub was not a random seedling, but a named variety, grown from cuttings, I’m sure of it. Plant breeders have bred it to produce more flowers. Compare the photo of my friend’s plant with this botanical illustration:

Landscape and Permaculture Use

This drought tolerant, deer-proof and pest-free shrub offers a special bonus; nitrogen fixing. Elaeagnus form symbiotic relationships with bacteria called actinomycetes that form nodules on the shrub roots and fix nitrogen from the air. This characteristic is found in some plants that are the first to colonize disturbed sites. These pioneer plants can grow in poor soils and enrich the soil.

Taking a cue from nature, the permaculture design approach uses Elaeagnus as an early succession plant. Consider planting it in a windbreak of tough plants in poor soil and five years later remove some replacing them with plants that require more fertile soil.

Potential Crop Production

Researchers at the University of Wisconsin are exploring the potential for a commercial market for goumi. Planted in organic systems it can be grown like other hedgerow fruit crops like gooseberry, elderberry, serviceberry, and cornelian cherry. Plant them 4 feet apart and prune into multi trunk shrubs that are allowed to branch about two feet high and maintain at five or to six feet, so it can be mechanically harvested.

Goumi berries

An Edible Petiole: Four Reasons to Grow Cardoon

  • The edible portion, the leaf stalk or petiole, tastes like its sibling artichoke.
  • The form is dramatic—a bold architectural plant for the edible landscape.
  • Electric-blue flowers attract honeybees.
  • This giant perennial provides foliage and stalks for the compost pile.

Harvest Cardoon:

Cynara cardunculus is the botanical name of both cardoon and artichoke. If you grow cardoon as an edible ornamental, just harvest a few stalks in spring, the way you would harvest rhubarb. Let the perennial grow into its statuesque form. The early growth is tender while later in the season the stalks grow bitter. Let the flowers bloom as a bee crop but remove the spiky flower heads before they go to seed. In a few years the plant will be six feet tall.

Serious cardoon eaters, most of who live near the Mediterranean Sea, grow cardoon as an annual row crop planted on three-foot centers. Traditional growers blanch the crop in autumn 2 or 3 weeks before harvesting. Blanching deprives the plant of sunlight to reduce the crop’s bitterness. This process will not enhance the ornamental value, only the edible quality!

Here’s how:  In September or before autumn rains begin, pound a 5-foot stake into the ground close to the crown of each plant and hug the plant to the stake. Next tie twine to the base and spiral up to within six inches of the top. Or tie three separate pieces. Wrap with corrugated cardboard or heavy brown craft paper. Let the top of the plant peek out. Blanch for two or three weeks and then harvest the entire plant. A faster blanching technique  involves cutting roots on one side of the plant, pushing it over without uprooting and covering the plant with dirt.

If you love grey foliage in the garden, but are not interested in the edible petiole, consider this: The Royal Horticultural Society in England has tagged cardoon with their Award of Garden Merit. At Ecology Action Grow-Biointensive the plant has been recognized as a compost crop. A mini-hedge of mature cardoon grows in their Willits garden during the summer and provides carbon for compost piles. Permaculture gardeners like to plant it as an edge crop.

The trick is to harvest the plant before it goes to seed. If you do save seed, please do it responsibly, as escapees have become invasive weeds in Argentina, New Zealand, and parts of California.

Culinary Preparation: Although many traditional cardoon recipes are dairy-rich, Chez Panisse Café has served it as a marinated salad. Prevent the oxidation that turns the leaf stems brown by tossing them in water with lemon juice. Cut stalks to fit in a pan and boil for 15 minutes to remove the bitter flavor. Peel the ribs from large stalks.  Cut into pieces and toss with olive oil and vinegar and garnish with hard-boiled eggs.

Creating Wild hedgerows

Here is an article I wrote in the early 1990’s for the Port Townsend Leader.  Read it and go outside. Plan now and soon you can plant bare root native trees and shrubs.

One of my favorite sights in Jefferson County is the hedgerows of deciduous shrubs. Driving along the roads, I see thickets of oceanspray and snowberry and feel glad to live here. Hedgerows are distinctly rural; woody native plants that grew up along the margins of fields, escaping the tractor mowers because they root close to the fences. Over time the old barbed wire fences fall in disrepair. The mowed strip along the roadside also creates a habitat.

The old pastures and woods give way as new houses are constructed. We bulldoze hedgerows to make way for lawns. The wild plants can be too vigorous for a tidy little garden, but they really have a charm that marks this as distinctly the Pacific Northwest. Look closer and the vegetation will tell if it’s of the rainforest or native to the rainshadow.

Hedgerows are always changing with the seasons: Indian Plum and red flowering currant herald spring, followed by serviceberry and later roses. Midsummer calls forth the oceanspray’s frothy bloom while hummingbirds sip the orange honeysuckle. The golden hues of cascara and Scoulers Willows in autumn mix with the scarlet and orange hues of choke cherry and vine maple. Snowberries; plump and white, and the shiny black fruit of twinberry feed the birds in winter, and the seasons go round.

I want to establish hedgerows along the margins of my property. They make good windbreaks and privacy screens, and are natural birdfeeders. In two, maybe three years they are established; native plants take little effort to maintain – they hold their own against the invasive weeds and they survive on rainwater.

What made me start thinking about this was the flyer I got in the mail from the Jefferson County Conservation District.

Every year they sell bare-root seedlings. Native trees and shrubs are sold in bundles of ten for only $7.50. They offer plants for areas with low rainfall such as ocean spray and for wetter areas they offer cascara.

Order the plants now; then go outside to take a critical look around and decide on your strategy. You have a month before they arrive.

There are two basic ways to work with the bare-root seedlings; plant them in their permanent home or plant them all together so they are easier to tend. Restoration planting on a large scale relies on planting many and risking the odds that enough will survive on their own with little maintenance. Home landscaping on the other hand, implies fewer plants receiving more individual attention. Remember, these plants are only the size of a pencil when they arrive.

What works best for me is planting the trees and shrubs in rows to create a nursery bed. Since they are all in one place, it is easier to weed and water them for a few years. I started my nursery about five years ago and each winter, when the shrubs are dormant, I dig some more and plant them around my property. Right now I have willows, serviceberry, and red twig dogwoods that need to be moved.

When we get a warm spell in winter, I like to tackle some of the overgrown grass around my place and create new planting areas. I can work with the mattock rooting up clumps of grass and thistle, knowing that in a week the ground will still be dormant. That way I can take it slow and enjoy the process rather than feel overwhelmed and rushed by rapidly growing weeds.

An even easier way to deal with the weeds or sod is to lay cardboard, old carpet, or plywood over the area. Cover this with a layer of hay, leaves, or brush as a mulch. This organic material will slowly decompose and can go into the compost or garden when you are ready to dig up the dead sod.

A permaculture technique, that I have yet to try, is a no dig approach. Lay down cardboard, then place a thick layer of organic mulch -up to eight inches and leave it for a year. When the sod is dead spade right through to the ground and make a wedge for the bare-root plant.

” Grow Your Own Native Landscape” is an excellent guide to help you choose the right plants and learn their characteristics and growth requirements. It is available for $5.50 from W.S.U. Cooperative Extension. I called Al Latham at the Conservation District. Even though the deadline is passed, he said there is still time to order the seedlings. Call them at 385-4105. Enjoy creating your own wild thickets.

One of my favorite sights in Jefferson County is the hedgerows of deciduous shrubs. Driving along the roads, I see thickets of oceanspray and snowberry and feel glad to live here. Hedgerows are distinctly rural; woody native plants that grew up along the margins of fields, escaping the tractor mowers because they root close to the fences. Over time the old barbed wire fences fall in disrepair. The mowed strip along the roadside also creates a habitat.

The old pastures and woods give way as new houses are constructed. We bulldoze hedgerows to make way for lawns. The wild plants can be too vigorous for a tidy little garden, but they really have a charm that marks this as distinctly the Pacific Northwest. Look closer and the vegetation will tell if it’s of the rainforest or native to the rainshadow.

Hedgerows are always changing with the seasons: Indian Plum and red flowering currant herald spring, followed by serviceberry and later roses. Midsummer calls forth the oceanspray’s frothy bloom while hummingbirds sip the orange honeysuckle. The golden hues of cascara and Scoulers Willows in autumn mix with the scarlet and orange hues of choke cherry and vine maple. Snowberries; plump and white, and the shiny black fruit of twinberry feed the birds in winter, and the seasons go round.

I want to establish hedgerows along the margins of my property. They make good windbreaks and privacy screens, and are natural birdfeeders. In two, maybe three years they are established; native plants take little effort to maintain – they hold their own against the invasive weeds and they survive on rainwater.

What made me start thinking about this was the flyer I got in the mail from the Jefferson County Conservation District.

Every year they sell bare-root seedlings. Native trees and shrubs are sold in bundles of ten for only $7.50. They offer plants for areas with low rainfall such as ocean spray and for wetter areas they offer cascara.

Order the plants now; then go outside to take a critical look around and decide on your strategy. You have a month before they arrive.

There are two basic ways to work with the bare-root seedlings; plant them in their permanent home or plant them all together so they are easier to tend. Restoration planting on a large scale relies on planting many and risking the odds that enough will survive on their own with little maintenance. Home landscaping on the other hand, implies fewer plants receiving more individual attention. Remember, these plants are only the size of a pencil when they arrive.

What works best for me is planting the trees and shrubs in rows to create a nursery bed. Since they are all in one place, it is easier to weed and water them for a few years. I started my nursery about five years ago and each winter, when the shrubs are dormant, I dig some more and plant them around my property. Right now I have willows, serviceberry, and red twig dogwoods that need to be moved.

When we get a warm spell in winter, I like to tackle some of the overgrown grass around my place and create new planting areas. I can work with the mattock rooting up clumps of grass and thistle, knowing that in a week the ground will still be dormant. That way I can take it slow and enjoy the process rather than feel overwhelmed and rushed by rapidly growing weeds.

An even easier way to deal with the weeds or sod is to lay cardboard, old carpet, or plywood over the area. Cover this with a layer of hay, leaves, or brush as a mulch. This organic material will slowly decompose and can go into the compost or garden when you are ready to dig up the dead sod.

A permaculture technique, that I have yet to try, is a no dig approach. Lay down cardboard, then place a thick layer of organic mulch -up to eight inches and leave it for a year. When the sod is dead spade right through to the ground and make a wedge for the bare-root plant.

” Grow Your Own Native Landscape” is an excellent guide to help you choose the right plants and learn their characteristics and growth requirements. It is available for $5.50 from W.S.U. Cooperative Extension. I called Al Latham at the Conservation District. Even though the deadline is passed, he said there is still time to order the seedlings. Call them at 385-4105. Enjoy creating your own wild thickets.