June 2024 Garden Chores

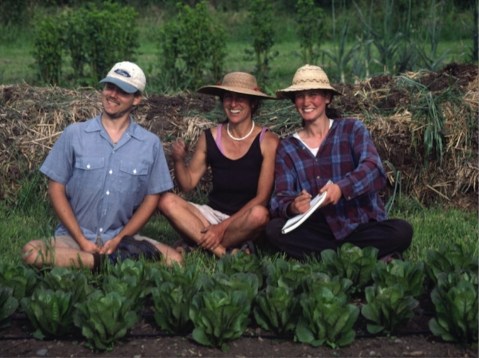
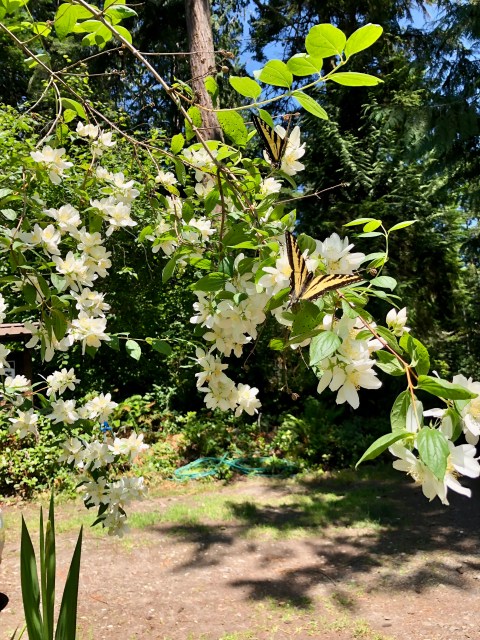
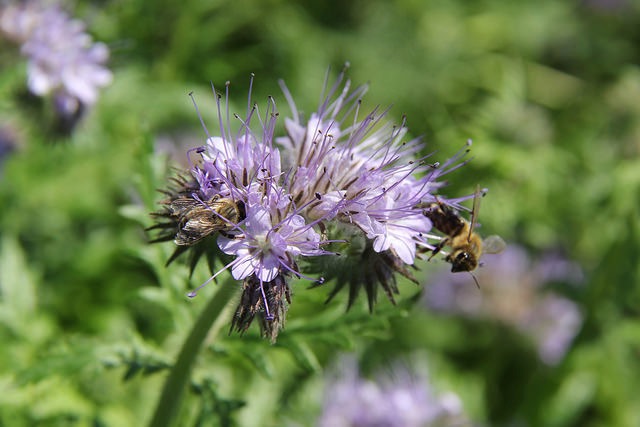
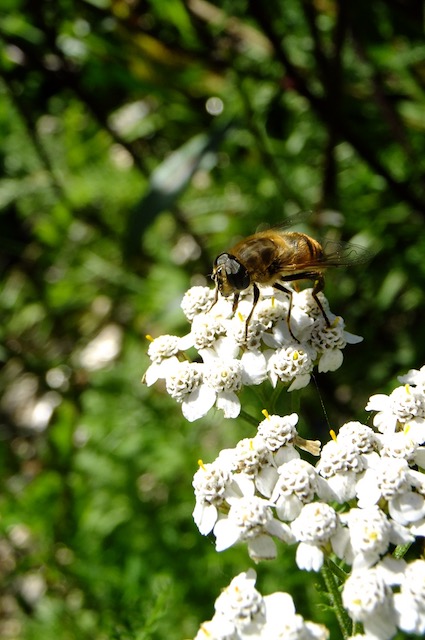
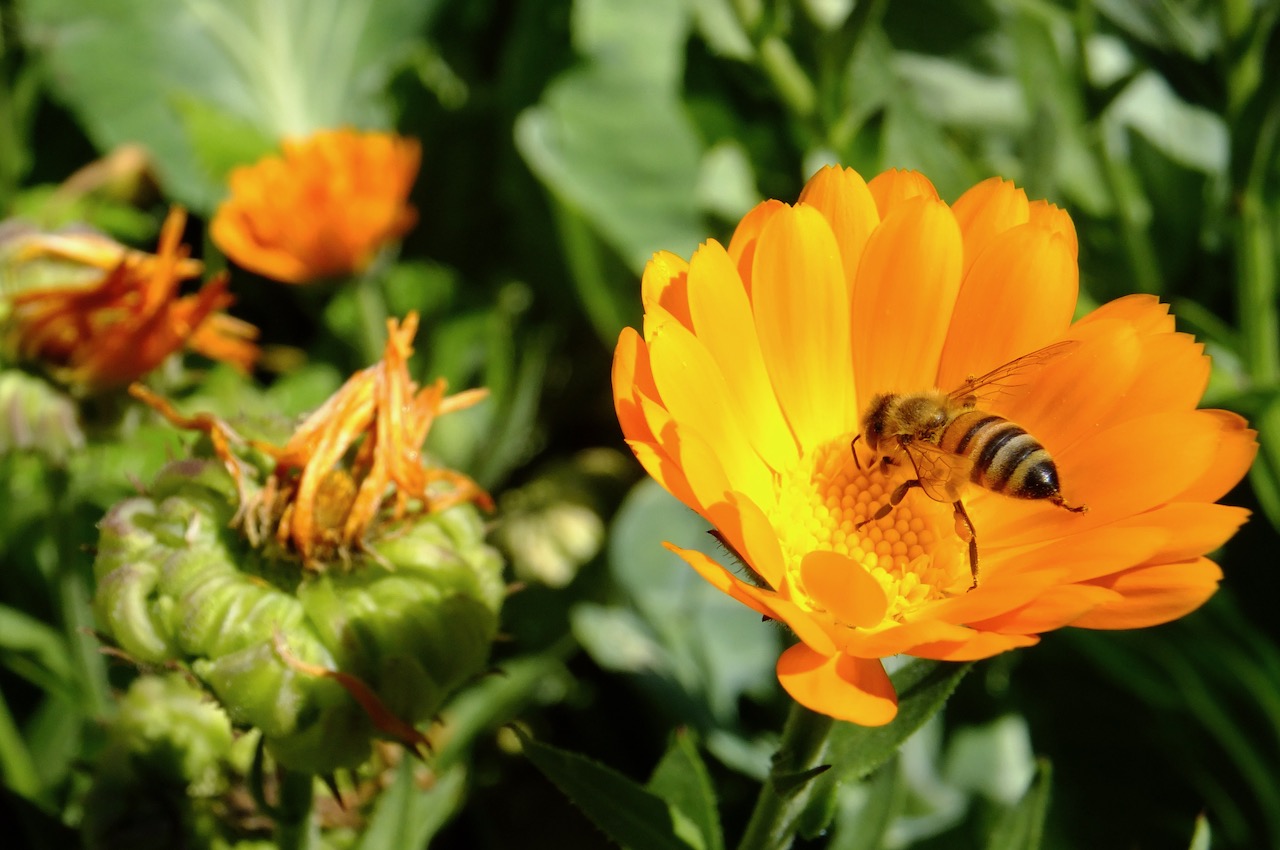
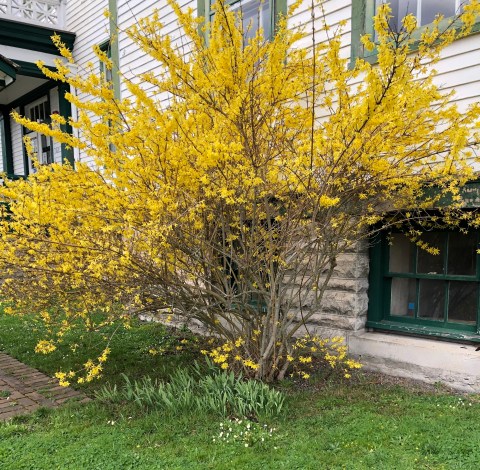
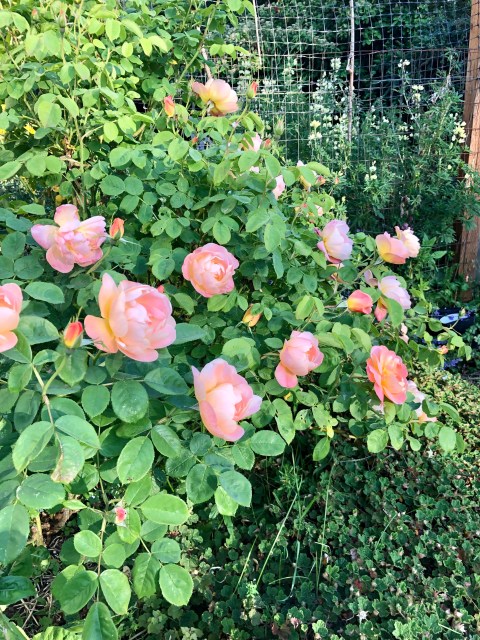
The garden is a riot of blooms bursting with color. Let’s take a look at English garden roses, one of my favorite. Goumi, the earliest fruit in my garden has a sweet-tart flavor that I love to nibble. The garden is alive with bird songs! Robins in the garden are fun to watch as adults seek out worms and their fledglings beg for food.

By now in the vegetable garden, the cool season crops are producing and warm season crops are in the ground. Before the month is out we will be preparing for the winter garden.

Edibles

Tomatoes: Begin training indeterminate tomatoes. Train a couple of main stems. When new shoots form between the main stems and a leaf, pinch out these suckers. There will be less fruit but they will ripen sooner. Remove some foliage if it is excessive but leave some to protect the fruits from sun-scald.

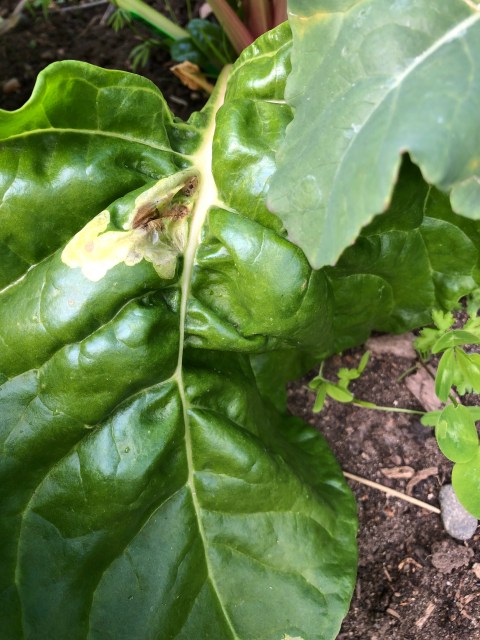
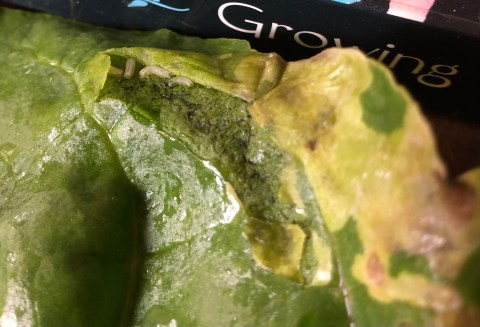
Vegetable Pests: Watch for signs of leaf miners on spinach, beets and Swiss chard. The larvae form tunnels between the layers of leaves that look like yellow trails and pockets. As the fly larvae metabolize the plant they deposit black frass. Hand pick the leaves and trash them. Don’t place them in compost!

Swiss chard leaf with yellow spot indicating leaf borer within.
Leaf miner maggots visible on top left. The top layer of leaf was peeled back to reveal these fly larvae.

Garlic: Harvest scapes ( curvy shoots with flowering head) Stop watering when leaves start to turn yellow. Harvest when only 4 leaves are still green, or the bottom 1/3 of foliage is yellow. For longer storage, cure (dry) garlic with the tops and roots for several weeks, allowing nutrients into the bulb. Cut tops and roots leaving as much skins to protect garlic bulbs.Prevent the spread of garlic rust fungus by starting with certified disease-free bulbs, rotate crops and use a mulch of arborist chips to prevent rust from establishing in soil.

Asparagus:  Mature fronds can get top heavy and fall, sometimes snapping at the base. For attractive plants in an edible landscape stake individual plants or prop up with bamboo. For asparagus in rows place a metal t post at each end and run jute twine between the posts. To keep the plants together weave the string between plants. In the fall when the shoots die to the ground, the jute can go into the compost along with the dead asparagus.

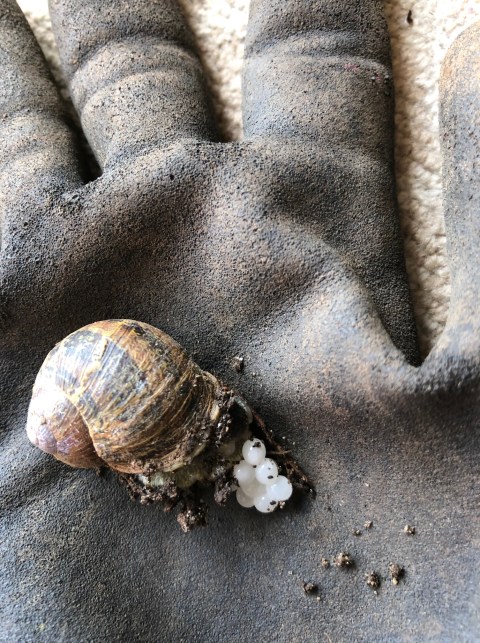
Fruit Trees: Thin fruit, and watch for signs of fungal disease that spreads by splashing water. Use neem oil spray or sulfur powder. Look for and destroy tent caterpillars. Patrol for slugs and snails.

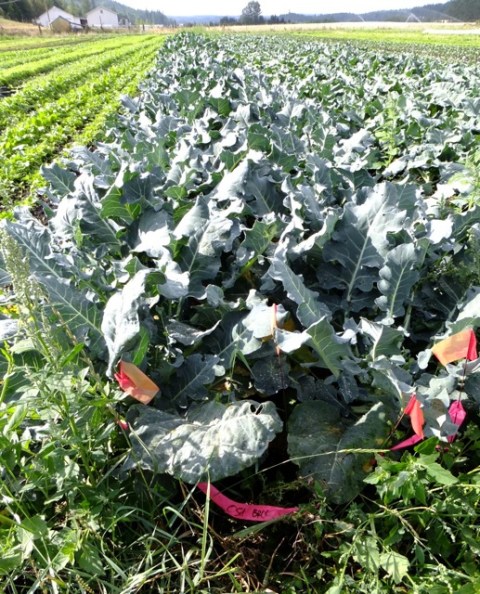
Winter vegetable garden It can be confusing to newbie gardeners that just as the summer solstice arrives, we begin sowing seeds for winter harvest! Sow brassicas  including winter cabbage, kale, and purple sprouting broccoli. from mid- to late June. If you miss this window, buy vegetable starts at the coop next month. Purple sprouting broccoli is the most successful winter broccoli with its small and numerous shoots. Early July is time to sow the following: carrots, beets, Swiss chard, kohlrabi and radicchio. (Crops for late fall harvest grows through the autumn equinox and then growth slows almost to a standstill.)

Ornamental Plants

Deadhead Rhododendron. By gently snapping off the flower cluster, seeds won’t form, instead we allow the shrub’s energy to be directed into growing foliage and starting next year’s flower buds.

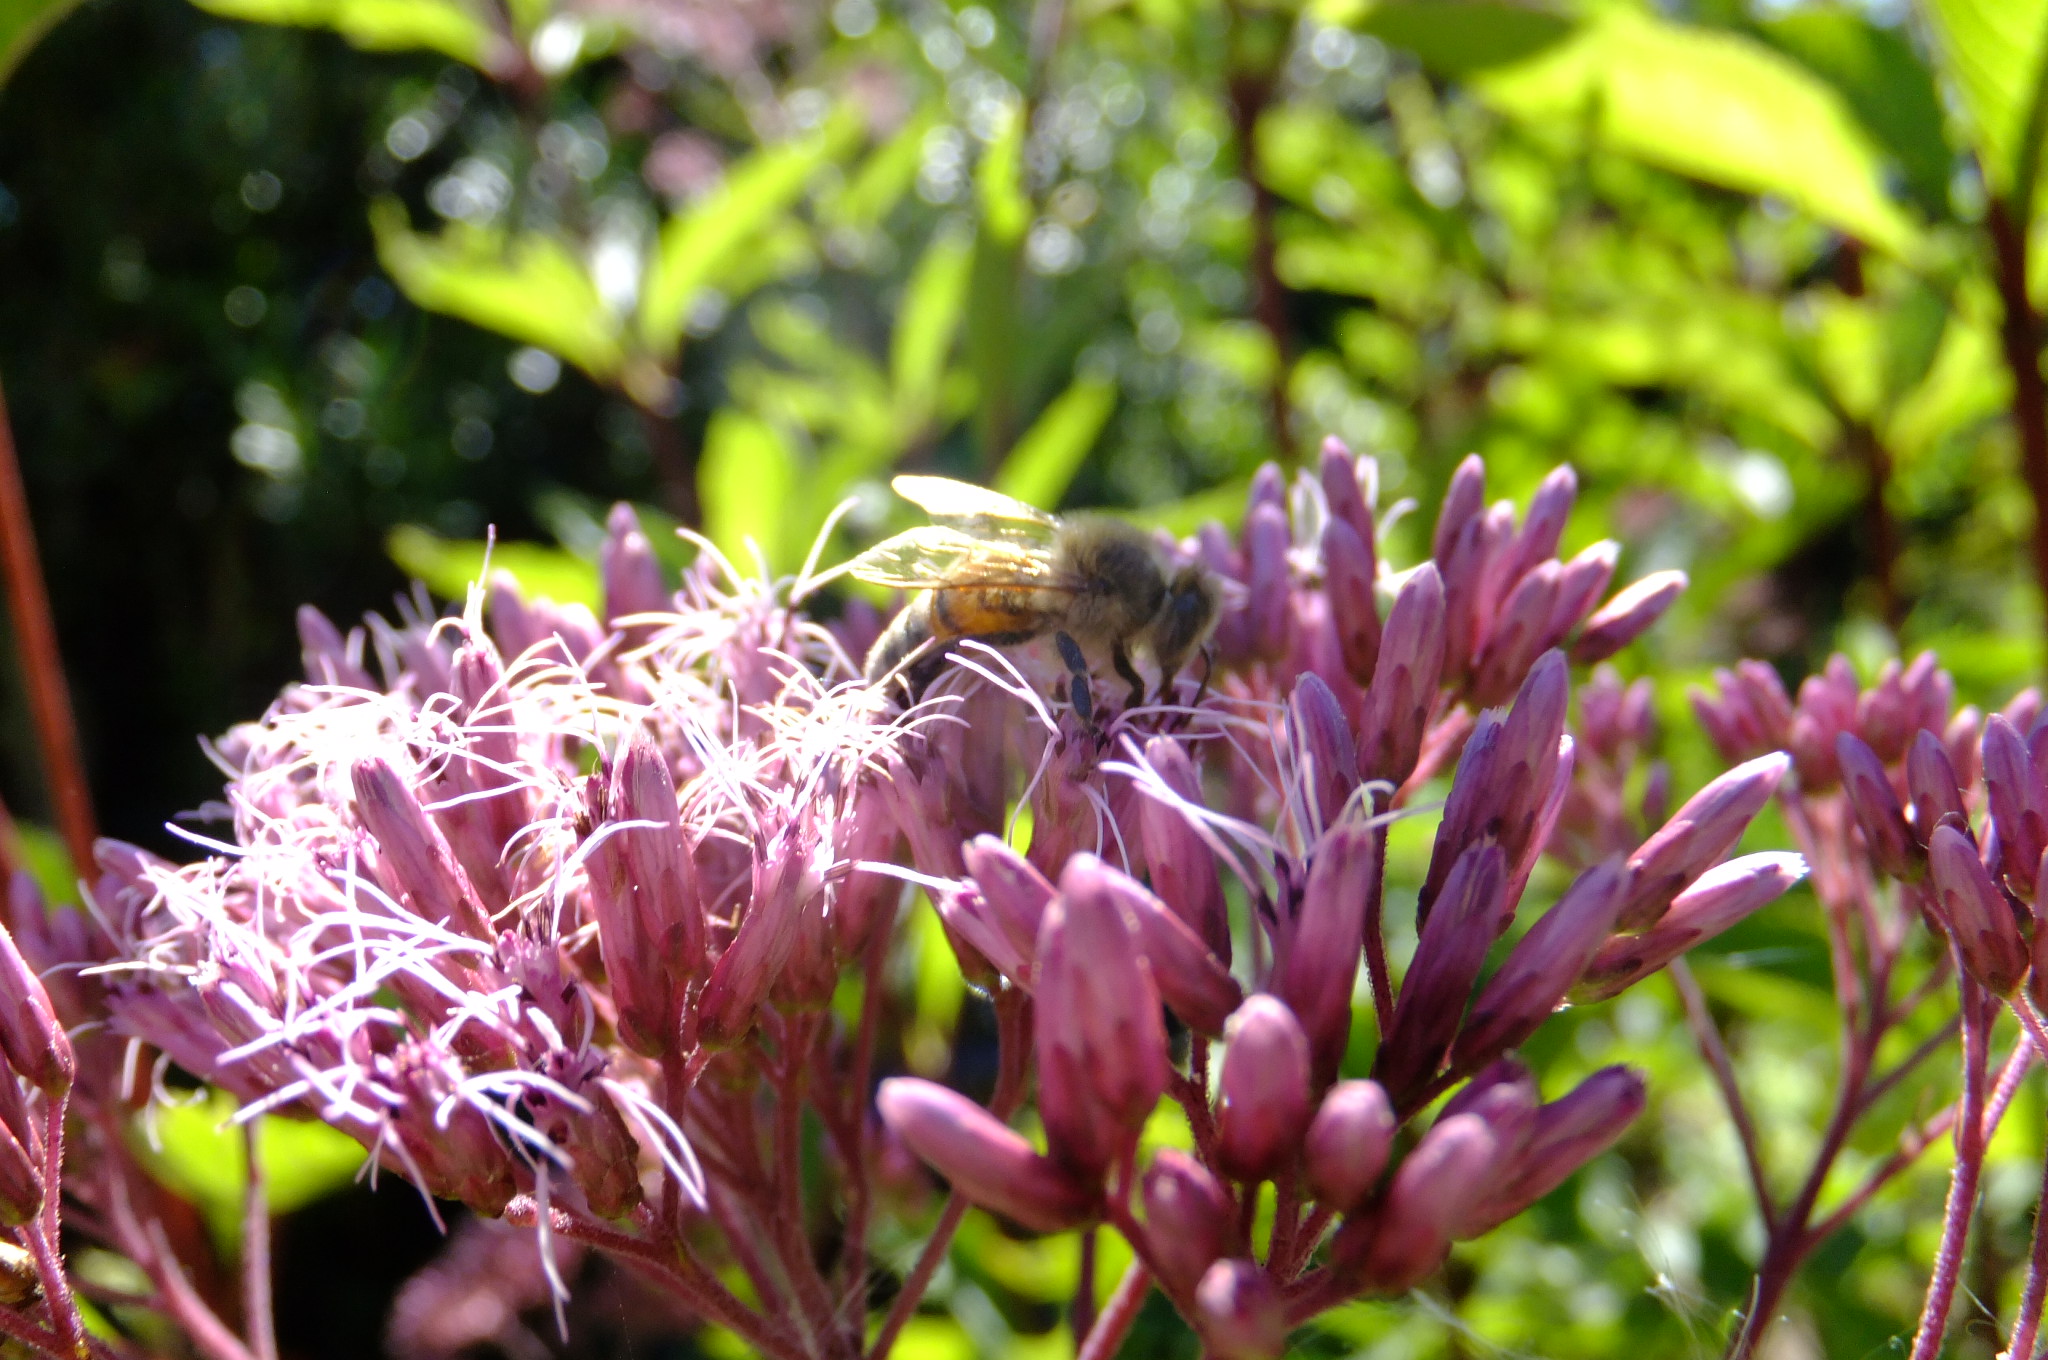
Perennial Flowers: Some late summer and fall- blooming perennials, pinch back now for sturdier and shorter stems. Remove the top 1/3 of the following plant Asters, mums, beebalm (Monarda),  and Joe-Pye weed.

Fungal diseases are exacerbated by rain. Powdery mildew is not one disease but a symptom.Caused by different fungal diseases, the symptom is white circular patterns with a powdery texture, becomes gray or brown over time. The disease is more than cosmetic; it inhibits photosynthesis. It can overwinter in buds and also on dropped infected foliage on the ground. Humid weather and crowded conditions that cause stagnant air encourages fungal growth. Neem oil or sulfur can be effective when used  at first signs. Safer brand Fungicide is another option.

Winter Injury: By now many plants have recovered from the winter. Evergreen shrubs that dropped foliage are now leafing out. Old stands of red-hot-poker that completely died to the ground with many rhizomes turning to mush are now leafing out. All these plants require monitoring, removing dead wood and watering during dry spells.

Tinker’s Water-saving Tips

Tinker with apprentices at Abundant Life Garden 1990’s

Tinker was an advocate of living lightly on the Earth by conserving resources and living a joyful life of volunteer simplicity. This post is for local farmers who may not know her legacy and want to continue this important work.

Along with Judy Alexander, Tinker spearheaded the Dryland Farming Project, exploring the limits of what staples can be grown locally with little inputs, especially without irrigation. “We need to research ways that we can locally and sustainably grow staple crops such as grains, legumes, and seed crops.”

Today we have a vibrant farming community and many people share Tinker’s passion. Organic Seed Alliance develops seeds that grow organically with less inputs. Finn River is growing wheat and many others are working together toward a sustainable farming future.

Garden soil acts as a bank account, holding available water.” Tinker Cavallaro gave a presentation based on  the Dryland Farming Project ten years ago at the Quimper Grange. Tinker discussed her presentation with me beforehand and I wrote up the handouts. These are some of the notes:

Understanding our climate and the site’s soil properties is the foundation for making smart choices in garden irrigation. Rainfall quantities vary across the Quimper Peninsula. Close to the mountains, Quilcene gets much more rain. Port Townsend is located in the rainshadow of the Olympics, a unique area with less rainfall than most of Puget Sound. The rainshadow  of the North Olympics extends from Sequim to the San Juan Islands.

“As crops  grow they make heavy withdrawals from the garden soil bank account.” We will investigate more about soil properties but here are some basic tips:

Practices and techniques

  • Develop the habit of checking the soil for moisture
  • Use drip irrigation or low-volume sprinklers
  • Use water-filled containers with holes placed next to larger plants
  • Foliar spray or fertigation with liquid fertilizer known as ‘tea’ made of water and organic matter such as  compost, manure, seaweed or nettle
  • Raised beds hold moisture better than rows do
  • Plant seeds and transplants deeper than normal in the soil

Crops that do well with no extra water

Early Spring Crops

  • Peas
  • Greens: mustard, arugula & early lettuce
  • Kale, cabbage, early broccoli & radish
  • Direct-sown early carrots & beets that are heavily thinned
  •  Grains
  • Potatoes

Late Spring-Sown Crops

  • Field corn
  • Amaranth, quinoa
  • Winter squash
  • Dry beans including field peas, garbanzos, lentils & fava beans
Quinoa trials at Ecology Action in Willits, CA

Crops that require summer irrigation

  • Celery & celeriac
  • Napa cabbage and summer brassicas
  • Summer lettuce & spinach
  • Onions if you expect sizable bulbs
NOVIC Broccoli Field Trials at Red Dog Farm, Chimacum Washington

Understanding the Soil’s Capacity

Our rainy season, extending from fall through winter, provides enough water to bring our soils to field capacity, or the ability for the soil to hold all the moisture possible. Summer rains, on the other hand, are usually insignificant. In our windy location the little rain that falls often evaporates.

As plants  grow they make heavy ‘withdrawals’ from the garden soil bank account. Hot sun and wind cause plants to transpire moisture. The roots of plants pull soil moisture from the soil, up through the plant and out the surface of leaves. Foliage gives clues as to the plants ability to conserve water or use it freely. Drought-tolerant plants from dry climates tend to have small leaves or grey foliage. Magnification reveals tiny hairs that shade the leaf surface. The lush foliage of leafy green vegetables on the other hand can withdraw much water if not properly managed.

How plants utilize water

Plant roots, in a symbiotic relationship with soil microbes form a region known as the rhizosphere, the active site for water and nutrient uptake. Plant enzymes dissolve insoluble starches and oils that are required for plant energy and change them into water-soluble sugars. Roots draw moisture from the soil to their ultimate lateral spread and depth. The size of a plant’s roots indicates drought tolerance.

Healthy soil includes air and water. This water can move upward through the soil by a process known as capillary action. Water is drawn up in a wicking action through the gaps between soil particles. Soil texture determines the soil’s capacity to hold moisture. Sand holds one inch of water per foot of soil. Sandy loam (soil with a bit of silt and clay) can retain 2 inches of water per foot; clay soil retains 3 inches of water per foot. The point is that clayey soil holds three times as much water as sandy soil. If the capillary action is not strong enough then the gravitational pull will sink water deeper into the soil.

Cohesion describes when water is attracted to water and adhesion describes when water is attracted to other materials. When irrigation or rain moistens the ground, soil particles act almost as magnets and water adheres to them. Like a wet sponge, the ground is holding as much water as possible. Water is highly cohesive so gravity will pull water deeper into the soil. This happens when the water cannot adhere to the surface of the soil. If the soil structure has enough pores and humus that acts like glue, more water can be utilized. Root systems have to be able to penetrate the soil, become more extensive, and grow deeper to utilize the soil water.

Plants are much healthier if they can aggressively seek new water in soils unoccupied by roots and grow deeper and wider. Not only will vigorous plants be capable of withstanding drought and wind, they will also create more flavors and sugars.

( For more information on this important topic see Steve Solomon’s Growing Vegetables West of the Cascades, Ch 5)

Mock Orange: A fragrant native

Philadelphus lewisii
Swallowtail butterflies on native mock orange

A delightful native shrub for early summer is Lewis’s mock orange, Philadelphus lewisii. This deciduous shrub has a fountain like shape and fragrant white flowers that grow in clusters.

It is equally at home in a cultivated landscape or a natural thicket. My introduction to this native came in a conservation bundle thirty years ago. When the shrubs matured and started to flower, I wondered if a mistake had been made. The flowers looked so much like the Philadelphus coronarius, a European introduction commonly seen on old farms in New England. Our native west coast mock orange is just as beautiful and better adapted!

This multi-stemmed shrub with long arching branches may grow 3-10 ft tall or more. I planted one by a shed where the rain spills off the roof and after thirty years, it is close to 15 ft tall. Since it was part of a native plant thicket planted along the roadside, I never pruned it.

Lewis’ mock orange is equally effective as an ornamental as it is in restoration plantings. It can be used in borders or grouped together for screens. In autumn the foliage turns lemon yellow.

Growing Conditions

Lewis’s Mock Orange is flexible about soil requirements. It prefers soil rich in organic matter but will grow in gravelly soil if provided moisture. Full sun will encourage more blossoms but the plant will be healthy in partial sun. This native will be drought tolerant once established.

Native Habitat

Mock orange can be found throughout the west from British Columbia to California. I am sad to say I have never seen it growing on the Olympic Peninsula but, in Nelsa Buckingham’s book Flora of the Olympic Peninsula, she says it occurs in open habitat here on the peninsula lowlands from north to east. also at mid-elevations from northeast to east.

Benefits

Pollinators love this nectar-rich plant. Birds that eat the seeds in autumn include junco, chickadee, thrush, flicker and finch.

May Garden Chores

Check the weather—It may seem shocking that now is the time to start watering but its true. Here in the rainshadow there may be drizzle, but often if you poke the soil you will notice how shallow the moisture extends. The Dept of Ecology has announced a statewide drought emergency due to the low snowpack. although we currently have a dry forecast, El Niño is rapidly changing into La Niña so the forecast may change.

Cultural practices

Avoid overhead watering that can spread fungal disease. Water the root zone. Water in the morning.

Drip irrigation and low-water options

  • Avoid water splash from soil. Prevent the spread of phytophthera of tomatoes
  • Prune for air circulation, avoid overcrowding, learn how large plants will grow.
  • Prepare beds with compost. Home-made or bought. Spread 1”-3” deep.
  • Handy tool for determining how much your garden can use;
  • Monitor for pests
  • Tent caterpillars, winter moth, European sawfly on currants,
  • Vegetable starts; plant the hot season cucurbits and tomato, peppers and basil.
  • Plant dahlia tubers: Late summer here is often warm and dry providing dhalias with the perfect weather to display their amazing variety of flower shapes and colors.
  •  Spring-flowering bulbs: This time of years the daffodils and tulips and smaller bulbs can look tired. Keep them healthy by removing the spent flower to prevent the plant from making seeds. We want all the energy going into nourishing the bulb, so let the foliage remain until it dries out completely. If you are a real neatnik who enjoys labor-intensive gardening that can be relaxing and meditative, consider braiding the narrow foliage of daffodils and snowdrops. To avoid big gaps when the foliage is gone, consider interplanting with native bleeding heart, Chinese for-get-me-not, or love-in-a mist, calendula or annual poppies.
  • Stake Perennials

Growing Flowers and Meeting Their Pollinators

My attitude about growing flowers changed the day I visited my friend Renee at her cabin in the Santa Cruz mountains, California. At the time I was a twenty-three-year-old horticulture student. I sat at her kitchen table, eyeing the room, when I noticed a bouquet on the kitchen table.

It was an arrangement of fragrant flowers with lavender, roses, delphinium, and baby’s breath. My internal dialog commented, “Oh those are probably from the UC Santa Cruz Farm and Garden.” It was a dismissive thought. You can’t eat them, what’s the point.

Then it dawned on me—I had picked those flowers and arranged this very bouquet, just two weeks before. My sister was then apprenticing at UCSC Farm and had invited me to gather a bouquet for Renee, a new mother. Stunned, I saw my bias. Flowers seemed frivolous, when I was on the revolutionary-edge of organic food growing in 1980.

That was the incident that changed my life, it was okay to love flowers as I always had. After getting my Horticulture degree, I apprenticed at Camp Joy in Boulder Creek, CA. I learned to sow seeds in wood flats;  tend young seedlings in the greenhouse; and plant them in double-dug raised beds.

Twice a week, before the sun rose over the mountain ridge, we harvested flowers and placed them in large tin cans in the shade of the gazebo. I was taught that the key to selecting young flowers was in the reproductive parts. I became skilled at noting if a flower’s stamens were moist with fresh pollen or not. Daisy-like flowers, with their disk and ray flowers were easy, once the secret was revealed. Bending down to look closely at the yellow center one could see if the rings of tiny flower parts were all open, if so then the flower was old. But if just a couple of outer rings of disk flowers were open, it was prime for harvesting.

The day I purchased my 20-magnification hand lens, the world of insects opened up. Looking through this loupe was like landing on a planet. By placing the lens close to my face, my hand on my cheek bone to steady the lens, I moved in close,  a spaceship landing on a  miniature  floral world. The intricate textures of leaves, flowers and seeds were mesmerizing. I peered deeply into a flower chamber,  translucent in color, while male and female flower parts became giant. I imagined myself a tiny creature crawling over these exquisite sculptures.

Honey bees on Phacelia

I had to study insects in the horticulture program, after all the little buggers ate our crops. But we also learned of beneficial insects–predators and pollinators. There was  humor in considering the caterpillar as a juvenile delinquent chomping on the parsley leaves, but then when the caterpillar metamorphosed into the Swallow-tail Butterfly, it pollinated flowers like a mature, contributing citizen.

Getting to know insects became part of understanding the garden ecosystem. Like a bird-enthusiast with binoculars, I sought insects with my lens. This requires patience! At first recognizing the different creatures based on their anatomy—wings and mouth parts being essential clues, eventually I moved on to noting their behavior.

Over the years I have watched green lacewings laying eggs; each on a solitary stalk. These predators are so voracious, the emerging young would eat the surrounding eggs if they were not out of the way. Also, I have seen lady bug larvae that look like giant Gila monsters gobbling up aphids. And no lie, I have watched aphids pop out live babies.

Lady bug larvae

Learning about pollinators in my backyard offered me the chance to slow down, and become curious. Did you know that a butterfly can taste with its feet? That when it lands on a petal that has nectar-bearing flowers that its siphon-like tongue unfurls? I have seen this. It takes patience, but watching insects is a form of miniature wildlife viewing.

Bees can see colors invisible to the human eye. Foxglove flowers have ultraviolet circles around maroon spots, marking a trail to lure pollinators deep into the trumpet bloom where a reward of pollen and nectar await.

The honey bee is but one of many kinds of bee. Native to the Mediterranean, and introduced around the world, it is a generalist, pollinating many flowers. And yet, it shares a characteristic with all bees that make them the premiere partner for flower pollination—floral fidelity. This means on any given foraging trip they only gather pollen from one species. Efficient for the insect and fundamental for the plant to produce seed, bees are the most important group of insects.

Scientists now know that bees are a keystone species–creatures necessary for the survival of other organisms in an ecosystem. Keystone species are referred to as the glue that holds a system together–without them an ecosystem may not be resilient enough to adapt to climate change. There are native flowers that depend on one or two types of bee to pollinate them.

Also, bees and other pollinators are responsible for food crop pollination. According to the USDA, bees, both honey and native are responsible for the pollination of 75 percent of fruits, vegetables, and nuts in this country. Another way to look at it is one out of every four bites of food can be traced back to pollinator services.

Jim Nelson at Camp Joy, a beekeeper, told me something I never forgot. “Imagine yourself tiny, the size a bee. As you approach a flat-topped white yarrow, a Sedum Autumn Joy, or a sunflower, you would see an  entire field of flowers.” A bee’s-eye view of the world makes me want to plant these flowers and patiently watch the insects that come foraging.

Selecting Shrubs at the Nursery

Most garden centers are temporary holding places for potted landscape plants. Freshly delivered plants from a wholesaler tend to be healthier than shrubs sitting in the yard overwinter. During dry spells in summer, note if the plants are getting watered or if the potting soil is dried out. Avoid plants that look like they have been sitting too long at the nursery.

Foliage

At the garden center, look at the foliage of the plant you are interested in. Sometimes it helps to step back and note all the plants of the same kind in pots. Look at the color. Is the overall color dark or bright green? (Of course, some plants are bred for other colored foliage including burgundy or yellow.) Avoid browning, yellowing, or wilting foliage. Are there pale or dark spots? Is the one you want fresh and healthy? A couple of sad leaves are okay—here we are looking at the overall health. Even if it is on sale, it is not worth it, unless you love tending sick plants or are a skilled gardener. Starting with the healthiest plants creates a vibrant garden.

Roots should be firm and white, not mushy or brown. They should mostly fill the pot but not be completely root-bound. A web of young roots filling the pot is okay but not thicker roots. Often at planting we use a knife to cut off slices of the rootball to allow new growth to spread out.

Structure and Overall Form

Now look at the woody stems of this young shrub. Do they join at the base? Sometimes several separate young plants are potted together to give the impression of a healthy big plant. Is it worth the price if your plant is really several juvenile ones packed together?

If the plants are healthy individuals, look at the way the stems are growing. Sometimes the plant is misshapen because all the pots were packed together and can be pruned once you get it home. Other times if you hunt through the offered plants you can find one with more uniform branching. It is worth taking the time to examine several potted shrubs. In any event, once you get the shrub home and dig a hole for it, turning it around in the hole can reveal its most attractive side to face out.

Asparagus

Asparagus shoots are emerging–here is a crop to test our commitment to delayed gratification!  Some clients have told me they tried growing asparagus but gave up. This perennial vegetable requires a dedicated bed and will produce for decades if well-tended. Growing asparagus well is time-consuming; let’s look at what it takes. One trick is to prepare the planting site well in advance.

 Preparing the bed: Diligently remove all perennial weeds and prevent them from getting established. Add lots of organic matter and water deeply until the plants are  established. If the soil is heavy clay,  prepare a raised bed. Wait a couple of years before harvesting to allow the plants to get established.

Harvesting: Begins for a couple of weeks in the third year. Snap or cut the shoots at the base. After about five years, harvest for almost 8 weeks or as long as the shoots are vigorous and finger-wide. Stop harvesting before emerging shoots are spindly. By allowing the fronds to grow and nourish the plant, we  prevent the plant from losing vigor.

The plants are either male or female. They are sold in nurseries as 1-year old crowns. All-male varieties have the advantage of bigger shoots. Growing them from seed means you will also have slender female plants that put more energy into producing red fruits and seed. Be sure to remove volunteer seedlings so they don’t crowd out the initial crowns. In the autumn after the plants turn yellow, cut them to the ground.

Staking: Do you lean more to the aesthetic or very efficient gardening mode? An asparagus crop is a prime candidate for edible landscaping with its ferny leaves. Stake individual plants or use a horizontal trellis (used for growing long-stemmed flowers) to allow the ferny fronds to sway a bit.

 If you have a no-nonsense, efficient approach to the garden then plant them in a row and place wood or metal posts at both ends. Once the plants are tall and start to bend, string a line from post to post and pin the plants in as the plants mature. A month later twine another string about a foot or two above the first to hold them in place. In any event, asparagus is a delicious addition to the garden.

April in the Garden 2024

Springtime can be overwhelming. Everywhere we look something is calling out in need of attention. One of my garden mentors, Beth Nelson from Camp Joy Gardens, always said, “The garden is forgiving. If we don’t get it right this year, we can try again next year. Be patient with yourself.” Enjoy the time in the garden. Here are suggestions for where to begin:

  • General garden maintenance
  • Liquid fertilizer like fish and seaweed solution benefits plants more quickly in cold soil than the dry fertilizer.
  • Control weeds before they flower.
  • In the edible garden
  • Time to pull back straw mulch to allow the soil to warm.
  • Plant bare-root strawberries and raspberries
  • Transplant vegetable starts
  • Cover pea bed with floating row covers
  • Direct sow root crops like radish, spinach, chard, lettuce, mustard greens
  • Top-dress beds of perennial crops and flowers with well-aged compost.
  • Landscape care
  • Read our post about pruning flowering shrubs
  • Replenish alder chips or arborist-chip mulch. Be careful with trunks of shrubs & trees—no mulch within six inches. (Mulch can keep the trunks moist and allow disease organisms to breed.)
  • Add lime to lawns.
  • Learn to appreciate the many benefits of weeds in the lawn—think polyculture!
  • Mow grass leaving it about 2 1/2 inches tall.
  • Hand pick & destroy slugs and snails. Learn to recognize snail eggs.
  • Sprinkle Sluggo or other nontoxic slug bait

Vegetable Starts

Start seeds indoors if you can grow healthy starts that are sturdy and dark green. Inadequate light causes the seedlings to grow spindly and fragile. Indoor lighting is dim compared with sunshine. Even a cloudy day offers more light than a typical florescent grow-light.

Once they have germinated, place the seedling trays outside on nice days. At first place them in a protected bright spot and then a day or two later, set them in full sunlight. And a light breeze will help then get sturdier. Also, by placing them outside, and bringing them in at night, the seedlings have begun the harden-off process. Otherwise, if they are greenhouse grown and then directly placed in the cold garden soil, the young plants can go into shock rather than grow.

The goal is to transplant them to the garden when they have two or three sets of true leaves. A grey, overcast day helps prevent transplant shock. If all this is too much effort, buy the vegetable starts. You can always sow your own seeds later in the season. We are so lucky here in Jefferson County to have excellent seedlings available from Midori Farm and Red Dog Farm. They are available now at the PT food Coop and Chimacum Corner Farmstand. They carry an array of vegetable varieties that thrive here.

Pruning

Shrubs that produce vigorous replacement shoots are good plants to learn pruning. These  flower on one-year old wood. If you only shear them, they never flower well. Also there will be a lot of thicker woody stems. Remove any crossing branches and weak or dead stems.

Proper pruning is a combination of thinning out—removing the branch all the way back to a larger branch, and heading back—what hedge shears are good for. Most novices just do heading back cuts. The problem is the plant grows into a dense hedge with just an inch or two of vegetation on the surface. A healthy pruning jobs increases the depth of foliage by allowing light and air in to the shrub.

Examples are flowering currant, mock orange (or Philadelphus), forsythia, kerria and flowering quince. Wait until the flowers are faded before pruning.

Making Lists

Springtime can be overwhelming. Everywhere we look something is calling out in need of attention. One solution is making lists. Walk through the garden and write down anything that needs attention. Next set priorities. Sometimes fifteen minutes is enough time to tackle a crucial task. To borrow a term from construction industry, consider making a punch list. Keep a running list of projects that require additional help or some expertise. At the end of the day, it is satisfying to cross off items. Of course, sometimes I enjoy puttering in the garden, skipping around in a relaxed fashion. This can be a form of horticultural therapy where enjoying the clouds skittering across the sky, or watching insect behavior is just as satisfying as accomplishing something.